Tag Archives: wallpaper lady Houston Texas

Phillip Jeffrie’s Grass in Master Bath

CindyK-lg8A

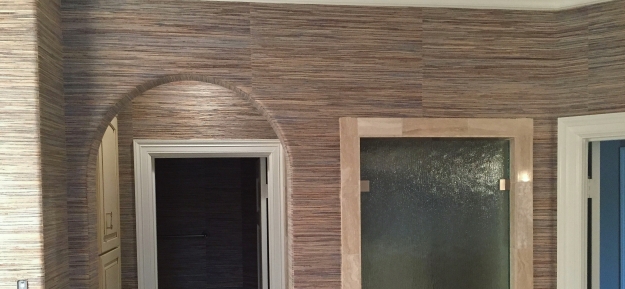
My client knew exactly what paper she wanted for her bright and spacious master bath – all she had to do was find it!
After a bit of searching and a lot of research, she ordered some samples. Going back and forth between two different products, she eventually decided on this gorgeous Phillip Jeffrie’s natural textured material.

The main target was to tie the master bath in with the bird’s-egg-blue that was a main color in the master bedroom. I am a little disappointed these photos of the completed job do not show that blue very well – even so, the character and warmth of the material made this area look amazing.
.PJ-SusansSKYBlue-3372

I have to admit this was also the most challenging job I have done in some time.

Here is a list of a few of those challenges:
1. Getting adhesive on the front of this particular material can stain it, so working clean, with dry hands, is a necessity.

2. Even after pasting the material and letting it sit to relax, it was too stiff to bend.
3. ~This also means it was difficult to cut.
4. Templates had to be made for the pieces that went around the trim at the windows.
5. Engineering the layout of the material for the three areas was time consuming.
6. Because it is made of grasses, bamboo, sisal etc, shading is to be expected.
This is referred to as ‘paneling’ by designers and installers.
Some natural materials ‘panel’ more than others, but it is not a flaw at all.
People love grasscloth for the inherent natural beauty of the product and choose it for the distinct beauty of a natural textured wallcovering, which can not be replicated with manmade materials.
1aFB GrassclothCover

The Biggest Challenge:   
7. There were nine (9) bullnose corners, and an arched doorway: See number 2.

…The rattan and bamboo in the “grasscloth” would NOT bend, let alone bend and stay adhered to the rounded edges and corners.

Determination, my magic wand, and a few [mild] expletives, helped me make this job a success!   😉


CKs-Before-After

BEFORE                                                     AFTER

*As a footnote I want to add that the homeowner experimented, then used a protective spray on this material where her towels may touch the walls.  It is totally undetectable.

CKs-BeforePics_ (4)   BEFORE

IMG_4486                                                                                              AFTER


CindyKret (60)CindyKret (62)


CindyK-lg5A

PJ Grass ck2

PJ rounded cornersCindyK-lg10A
My colleagues will understand  🙂


LGs-CK-9A


WallPaper & Faux Plaster Finish Combo


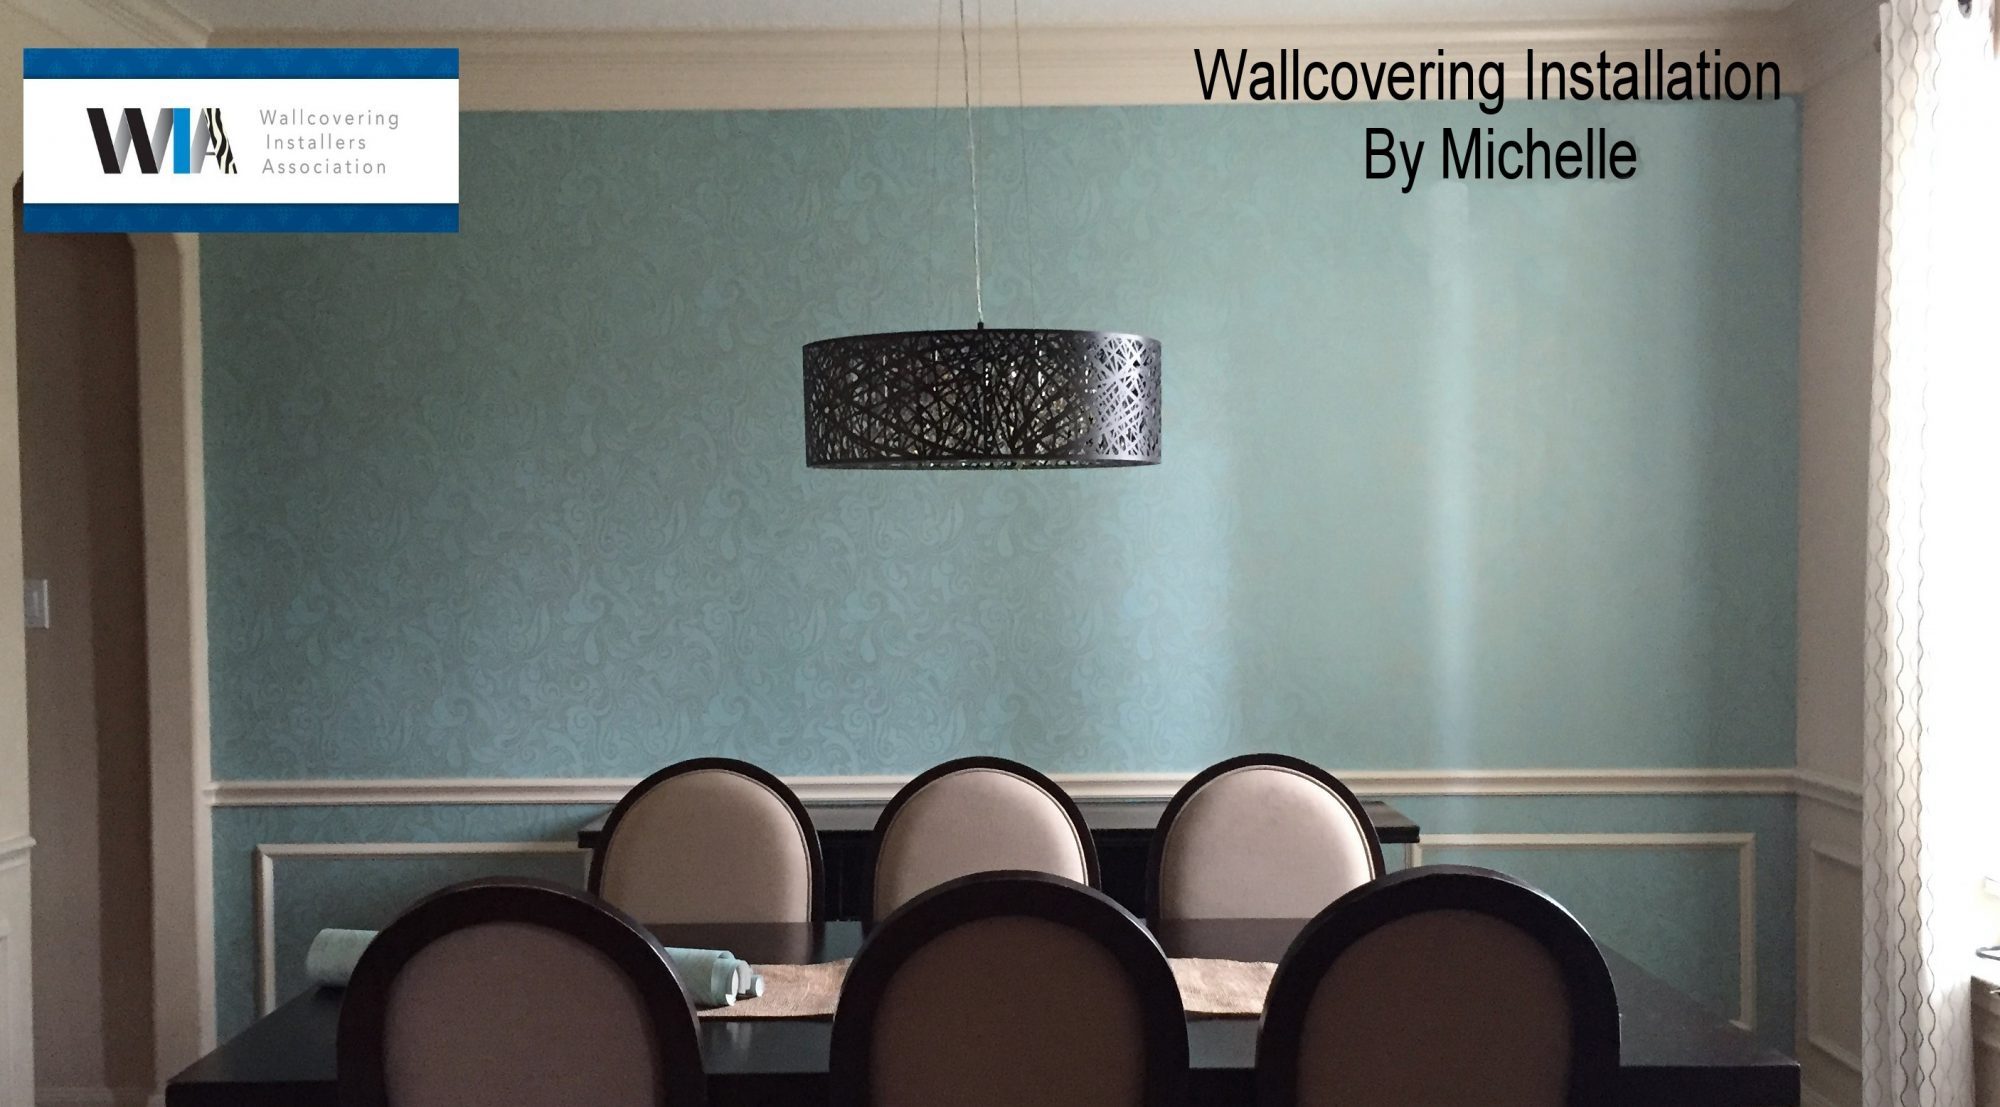
Part of the kitchen and breakfast area is shown above.

This home flooded and the floors and walls needed to be replaced, and/or repaired.
The kitchen wallpaper was the homeowner’s favorite and she really wanted to find the same thing to replace it.
Unfortunately it was no longer made, but she did have enough left over from the original job to replace the main area of the kitchen, just not enough for the breakfast room.
*I had an idea*   :)
I asked her: “Why don’t you have a chair rail put up around the breakfast room and I can add a faux plaster finish below it, matching the colors to the wallpaper’s background?”
She loved the idea!
About 12 inches of wall was removed all around the home.
It was quite a bit of work to remove what was left of the old papers on the now dry sheetrock.
I also stripped the paper from all the walls in two bathrooms, primed, then faux plastered and painted those rooms as well.
 
Did I tell you I was her original paperhanger which was 12 years prior?
It was just a coincidence that she found me, but BOTH of us were very glad to see each other again.
Hall Bathroom –
Before, with original paper.
Then, after stripping paper and applying a wash.

…And the final product.

The Powder Bath –
Before, with original paper.
The paper was used to make a border around the top because the homeowner wanted to preserve a bit of it.

A separate Art Niche –
Originally the same texture and color as the wall paint:
fauxfabulous-19


Photo Mural Repair

This mural in a local pizza business was damaged and needed either to be replaced or repaired, if possible.
You can judge for yourself how the repair worked out. The first two photos show some of the damage. I removed a 3/4 inch strip of the loose material, then touched up areas to bring it back as close to it’s original state as possible.


This slideshow requires JavaScript.


Mural Surrounded with Faux Weathered Plaster

This entryway went from ordinary painted walls to a

stunning masterpiece with an Old World feel!

The hand of God reaching out to Adam’s – (from Michelangelo’s ‘Creation of Adam’) is the centerpiece of the stairway wall. Surrounding it is a faux weathered Venetian style plaster. It was troweled on a bit more heavily than usual so we could see the depth of the plaster. 

A few days and many processes and applications later the area is no longer a generic entryway! The results were quite spectacular – extending around the corners, up over a doorway, then down the other side – framing out the entrance into the living area.  Unfortunately these photos do not show the depth of character and actual texture of the plaster. The overall appearance here is muted.

This room is definitely something that needs to be seen and experienced in person.

Questions? Need to schedule a consultation? You can scroll to the bottom of this post to contact me!

***Here is some of the finished area, but see below for more of the process***

IMG_0319


First, center, and prepare wall area for the mural.IMG_0288

Beginning to apply first layer of the ‘plaster’ IMG_0292

IMG_0296


IMG_4119

Above:  One of several applications of paint, glaze or sealer.

Below: Notice that I applied the faux material to the wall plug cover, painting it to match the wall.

IMG_0313


IMG_0314

If you look closely you will see the blue undertones that show through slightly around the outside of the mural area. I also added some cracks in the plaster in various places. These are sculpted into the plaster and painted.

More photos to come ~ In the meantime

Ciao,
Michelle
 

[contact-field label="Name" type="name" required="1"/][contact-field label="Email" type="email" required="1"/][contact-field label="Website" type="url"/][contact-field label="Comment" type="textarea" required="1"/]


Italian Mural Covered Art Niche

JD2a

I recently hung a canvas mural in an Art Niche and then painted two areas to complete it. There will be a wood frame going up all around this making it look like a wonderful Artwork! The homeowner is also putting a small accent spotlight on the little hall ceiling to light it up.

The art niche had to be floated smooth first, then wet sanded, primed and blankstock was hung. Next I began to plan the placement of the canvas. This was hung with a heavy duty clay based adhesive.

The top portion I painted on a primed canvas, sealed it, then installed it. The bottom, extended portion of the scene, I painted on-site.

This canvas mural was very wide (but not much taller than the space). It had to be cut down and centered without compromising any of the scene. This was difficult because there were other trees on the sides we thought should be included but had to remove them.

All’s well that ends well however!  It came out PERFECT!

JD5a     JD6a


JD7a                    JD3a

JD4a                              JD8a

JD9a

Once again please excuse my awful photography skills. We can’t be good at ‘EVERYTHING’ now can we?

Have a wonderful day ~

Michelle

Paintable Wallcovering Over Wood Paneling

LMitchel004

The Completed Room. There is wood paneling on all these walls!

This older home was ready for a facelift. The homeowners wanted to cover the wood paneling in the large living area, kitchen and breakfast areas with a paintable paper. The idea was to have the finished project look as though it was textured and painted AND have that texture match the existing paint texture. They had a vision and just needed a little help executing it.

After a long search for the perfect paper, then preparing the walls, installing the materials, and painting it all, the results were amazing! ~ Did I mention the homeowners painted it all themselves, including the trim and the high ceiling? – And they are a retired couple in their late 60’s?

Unfortunately my photos do not rise to the quality of my wallcovering installation skills…this is the best I can do with photography. Hopefully they are adequate enough to show the steps taken and the results.

These photos show the project from beginning to end. There were many steps taken in order to do it correctly and make sure the finished project would last many, many more years. Those steps included removing the window coverings and rods, removing all the plug covers, nails and pictures from the walls, washing down the paneling with ammonia, priming all of it with Draw Tite, floating the grooves, sanding and refloating the grooves (and any uneven areas of the panneling), then another coat of Draw Tite. Blankstock was hung assuring all was sound and smooth and giving me an awesome surface to hang over.

As a side note: This particular paper was thin, and once pasted, it was similar to hanging wet paper towels. It was so bad, my razor knife just caught it and shredded the edges instead of cutting it. I fought with it all the way around the room. The brick wall and fireplace were real challenges to cut around.

BEFORE1a

This is the room just as I was beginning to work.

longWoodPaneled

A good look at the paneling

Floated Grooves

All the grooves had to be filled in.

GroovesWoodPaneled

Long wall, partly prepped.

BWallBStockPanel

Some blank stock wall liner is going up.

blankStck BrRoom

The Breakfast room below the chair rail is also panelling. Here it is with blankstock on it. Almost ready for the paintable wallcovering.

paintableLongWall

The paintable wallcovering is now up on this wall. This wallpaper is by ‘Brewster’.

PaintablePaper2

Opposite wall has paper now.

This photo was sent to me by the homeowner, after they painted the wallpaper to match the existing paint on the surrounding walls. They even painted the wood trim all around the room. What an amazing difference!

LMitchel005