Author Archives: Paperhanger

Phillip Jeffrie’s Grass in Master Bath

CindyK-lg8A

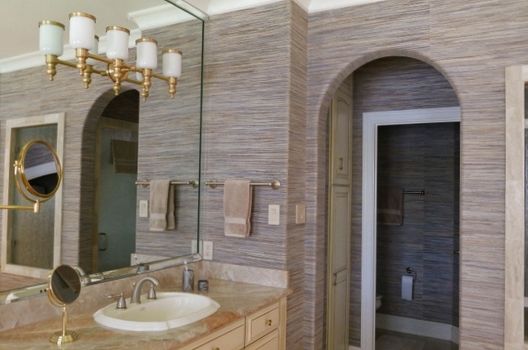
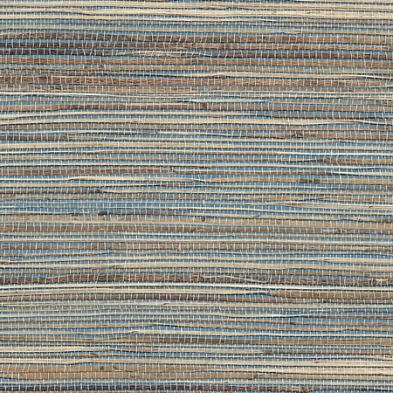
My client knew exactly what paper she wanted for her bright and spacious master bath – all she had to do was find it!
After a bit of searching and a lot of research, she ordered some samples. Going back and forth between two different products, she eventually decided on this gorgeous Phillip Jeffrie’s natural textured material.

The main target was to tie the master bath in with the bird’s-egg-blue that was a main color in the master bedroom. I am a little disappointed these photos of the completed job do not show that blue very well – even so, the character and warmth of the material made this area look amazing.
.PJ-SusansSKYBlue-3372
I have to admit this was also the most challenging job I have done in some time.

Here is a list of a few of those challenges:
1. Getting adhesive on the front of this particular material can stain it, so working clean, with dry hands, is a necessity.

2. Even after pasting the material and letting it sit to relax, it was too stiff to bend.
3. ~This also means it was difficult to cut.
4. Templates had to be made for the pieces that went around the trim at the windows.
5. Engineering the layout of the material for the three areas was time consuming.
6. Because it is made of grasses, bamboo, sisal etc, shading is to be expected.
This is referred to as ‘paneling’ by designers and installers.
Some natural materials ‘panel’ more than others, but it is not a flaw at all.
People love grasscloth for the inherent natural beauty of the product and choose it for the distinct beauty of a natural textured wallcovering, which can not be replicated with manmade materials.
1aFB GrassclothCover

The Biggest Challenge:   
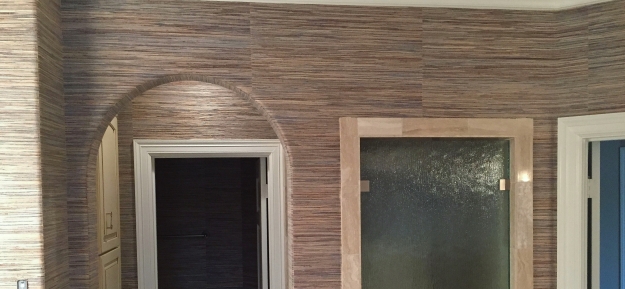
7. There were nine (9) bullnose corners, and an arched doorway: See number 2.

…The rattan and bamboo in the “grasscloth” would NOT bend, let alone bend and stay adhered to the rounded edges and corners.

Determination, my magic wand, and a few [mild] expletives, helped me make this job a success!   😉
 

CKs-Before-After

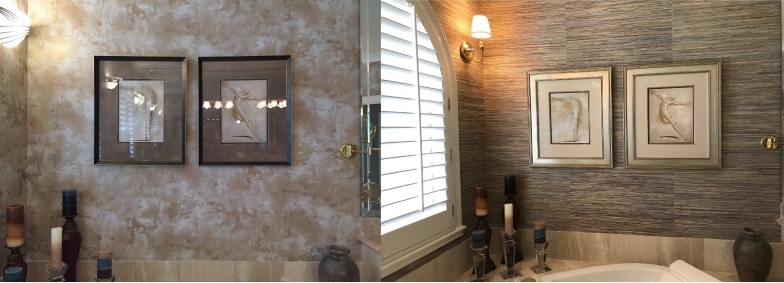
BEFORE                                                     AFTER

*As a footnote I want to add that the homeowner experimented, then used a protective spray on this material where her towels may touch the walls.  It is totally undetectable.

CKs-BeforePics_ (4)   BEFORE

IMG_4486                                                                                              AFTER


CindyKret (60)CindyKret (62)


CindyK-lg5A

PJ Grass ck2

PJ rounded cornersCindyK-lg10A
My colleagues will understand  🙂


LGs-CK-9A


A Master Bath With Timeless Style

Wallcovering has turned this Master Bath into a warm inviting retreat.
This vinyl pattern has a small weave texture and a little bit of gold color that adds an understated elegance! The look is timeless, and will go with anything the homeowners  want to do to this room in the future. Being a vinyl, it is washable and will resist staining.
Unfortunately the texture and gold in the pattern can not be seen in my pictures but none-the-less the room looks stunning!

This was the texture on the walls:

B4-Texture-CDIMG_4286
IMG_4288IMG_4295IMG_4294IMG_4293IMG_4292


Repapered Kitchen, A Dramatic Change

This kitchen and breakfast room went from frumpy to fabulous with only a change in wallcovering. At one point in time, the striped paper was dashing and trendy…but that was yesterday. Today, it has undergone a complete facelift; becoming an example of classic sophistication.
The grasscloth-look, vinyl wallcovering, opens up the room making it appear less busy and larger.
Isn’t it amazing what wallpaper can do?
I love what I do for a living!

BEFORE:
IMG_4282B4-CD-Breakfast


AFTER:IMG_4338IMG_4329IMG_4342

In the last photo, you can see the variations of color on the wallcovering. See over the cabinets – it’s not a solid color. (Unfortunately it’s not showing up well in my pictures.)IMG_4335

Remodel of Previous Posted Job Is Complete

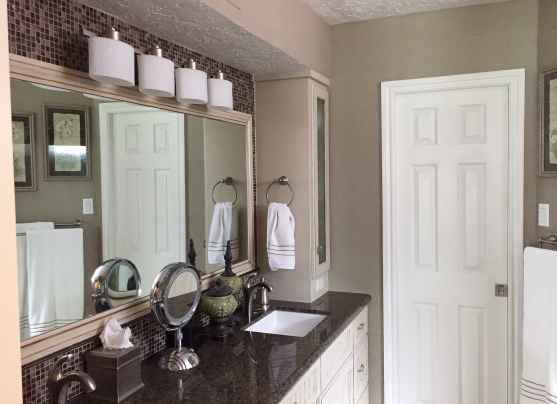
Gray paint, black granite and glass tiles give stunning results to this bathroom update. These photos were taken when I went back to repair several areas and replace some of the paper on a job I had previously posted here on my Blog.

The homeowners were aware the paper should go up last but were not sure when, or if they were going to change out the tile and countertop. Because of this I did make sure they ordered slightly more paper than needed.

So a few weeks later I got a call. It seems like they decided to change the tile and the counter right after I installed the paper 🙂

When I walked back into this bathroom I was in awe at the difference!
I love the color they painted the cabinets…LOVE the glass tile, and…well, just everything!
It is a remarkable change for such a small space.
Check out the before photos by clicking on the link below.
You will see the original paper ~ and then this paper, but it was definitely not this gorgeous!

To get to the original ‘before’ post, click on the underlined heading below.

From Dark Stripes to A Light Grey Hall Bath

Let me know what YOU think!
Until next time,
Michelle


Kitchen in Red – Brewster Wallcoverings ‘Kismet, Gypsy Red’

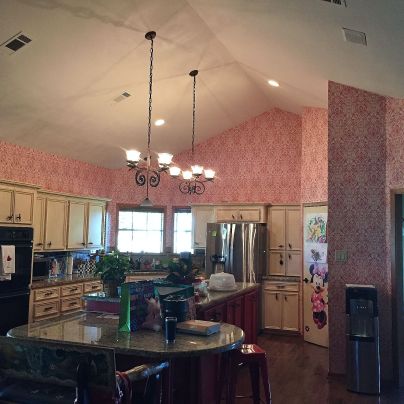
   This was a very cut up kitchen and breakfast area with many challenges, including a 16 foot high area that was difficult to get to. Of course, to me, it made the completed job even more satisfying! Don’t you think the final look is awesome?
    The Brewster wallcovering (Kismet pattern in gypsy red) made the bold, red island pop. The before photo show how unnoteable the walls were in brown taupe.
    The walls had five to six layers of wallcovering and backing papers on them.
In the kitchen area the top layer of paper was painted and textured with a semi gloss paint. This had to be stripped completely off. The breakfast area still had the previous wallcovering on the top and had been painted over below. Both had layers of backing paper beneath.
    After stripping the rooms, priming with a white primer, floating, then sanding – I hung a blankstock lining material to assure a smooth well adhered final installation.
Because of the difficulty (and my short stature) getting to the high area over the refrigerator, I had another member of the Wallcovering Installers Association help me hang that section. I want to thank Don Dye of Houston, Texas for that.

As for the adorable children’s artwork; I know it adds quite a bit to the room, however, I think the new wallpaper makes it stand out even more than it did with the plain walls.
Being a grandparent, I can appreciate that. 🙂

BEFORE:
ashro4
AFTER:

ashro5b

ashro5ab4-ashr6

ashro9ashro7

Breakfast Area BEFORE:

Breakfast Area AFTER:

ashro8


WallPaper & Faux Plaster Finish Combo


Part of the kitchen and breakfast area is shown above.

This home flooded and the floors and walls needed to be replaced, and/or repaired.
The kitchen wallpaper was the homeowner’s favorite and she really wanted to find the same thing to replace it.
Unfortunately it was no longer made, but she did have enough left over from the original job to replace the main area of the kitchen, just not enough for the breakfast room.
*I had an idea*   :)
I asked her: “Why don’t you have a chair rail put up around the breakfast room and I can add a faux plaster finish below it, matching the colors to the wallpaper’s background?”
She loved the idea!
About 12 inches of wall was removed all around the home.
It was quite a bit of work to remove what was left of the old papers on the now dry sheetrock.
I also stripped the paper from all the walls in two bathrooms, primed, then faux plastered and painted those rooms as well.
 
Did I tell you I was her original paperhanger which was 12 years prior?
It was just a coincidence that she found me, but BOTH of us were very glad to see each other again.
Hall Bathroom –
Before, with original paper.
Then, after stripping paper and applying a wash.

…And the final product.

The Powder Bath –
Before, with original paper.
The paper was used to make a border around the top because the homeowner wanted to preserve a bit of it.

A separate Art Niche –
Originally the same texture and color as the wall paint:
fauxfabulous-19


Contemporary ‘Flora Teal’ Wallpaper by Graham & Brown

Suddenly Color!
by ‘Wallcovering Installation By Michelle’

Flora Teal, a Graham & Brown wallpaper, really brightened up this living area.
The whole room is very happy!
First photo below is the room before I started.
I am hoping the homeowner sends a few pictures so I can show the room all put back together!


Den_BsJob4

DeniseB (31)

I have been a professional paperhanger in the Houston and Cypress, Texas areas for several decades. I learned my craft as an apprentice. I was taught by two very skilled ‘wallpaper ladies’ who were perfectionists. They asked, and expected, no less of me. I am a proud member of the Wallcovering Installers Association which allows me to keep up with the latest products, techniques and wallcovering materials. It is an ever changing industry and, like anything else, being professional means I must stay informed. You can trust me to install your material like I was working in my own home. I am neat, honest, conscientious, and truly enjoy what I do for a living.

Photo Mural Repair

This mural in a local pizza business was damaged and needed either to be replaced or repaired, if possible.
You can judge for yourself how the repair worked out. The first two photos show some of the damage. I removed a 3/4 inch strip of the loose material, then touched up areas to bring it back as close to it’s original state as possible.


This slideshow requires JavaScript.


Aqua Blue Texture = Cool Tranquility

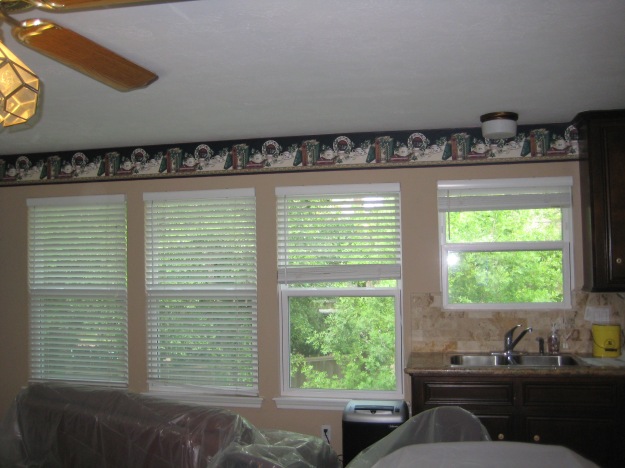
The walls in this large open office area were painted an ordinary, neutral, (umm…blah) tan. Around the ceiling, a dark border was the only added color and it was dating the area.
Then there was the beautiful bathroom sink cabinet and fixtures which were barely noticed against the dark red paint. The color also darkened the small room quite a bit.

The homeowners wanted to revitalize the area and decided on their favorite color, a soft aqua blue.  A heavy stucco-like texture was first applied to all the walls in the main room to add some distinct character. They kept the texture in the bathroom relatively light.

I just love, love, love, the new look. I can’t believe what a difference it has made.

~ So we start with the wall preparation. (It’s more like ‘demolition’.)

IMG_4984

Starting to prime the bath

JoannMay16

Voila. Bath is done!

Joann2016

Another snap of the Bathroom.

IMG_4974

From this…

Joann6

To this!

IMG_4973

One of three window walls ‘before’.


IMG_4985


Joann7

Love this color!